Propagation
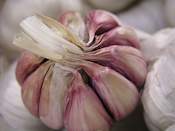
Propagation is from planting the cloves that make up the bulb of the garlic plant.
Planting Method
The garlic cloves are planted on raised beds of about one meter wide or on flat land that has been levelled to ensure good drainage. The garlic bulbs are peeled, and the cloves are carefully separated from each other.
Choose strong healthy cloves for planting to ensure uniform bulb production. Furrows that are five centimetres deep are drawn by tractor at the desired spacing.
Spacing
The cloves are normally spaced 10 cm apart within the rows that are 20 to 30 cm apart, depending on the size of the bulb desired. This should yield between 400 000 and 500 000 garlic bulbs per hectare.Planting Time
Garlic planting can be any time from late February to May.Growth Period
Five to six months from planting.Fertilization
Have your soils analysed to ascertain fertility and nutrient requirements. While preparing the soil for planting and ploughing in the compost and manure you can include some chicken manure as a preplant fertilizer.
The planted garlic cloves will use the reserves within the clove to push its first roots and sprout the first leaves. About 14 to 21 days after planting, broadcast (spread) between 500 and 800 kilograms per hectare of 3:2:3 (a mixture of Nitrogen, Phosphates and Potassium) over the planted area.
This will then be available to the newly rooted and sprouted garlic cloves and is essential for good root and leaf development, which in turn ensures healthy development of a good-sized garlic bulb.
Approximately eight weeks after planting during the vegetative growing period a further application of 250 to 300 kilograms per hectare of 3:2:3 can be broadcast on the planted area. If good vegetative growth has been attained, then no further fertilizer should be required. Sometimes on less fertile or sandier soils further applications may be required.
Irrigation
Applying mulching is always a good practice to reduce weeds and retain soil moisture. Water requirements will vary for different soil types and for differing weather conditions. Garlic is susceptible to moisture stress because of its shallow roots.
It is therefore imperative to have a consistent system to check soil moisture content in the top 30 cm of soil to reduce this risk. This can be done with a neutron probe, a soil tension meter or where this is not possible then manually with an augur or spade.
By Louise Brodie