Rock Formation
The rocks of the Cradle of Humankind region consist mainly of Dolomitic bedrock, which was formed on the bed of a shallow, warm-water sea that covered the Witwatersrand Basin about 3 billion years ago.

Dolomite rocks are basically made up of calcium carbonate (limestone) with a few extra oxygen isotopes thrown in for good measure. This creates a Karstic landscape, which is prone to the formation of caves as a result of subsequent erosion along fault lines under the surface.
The rocks around Sterkfontein and Krugersdorp date to about 2.6 billion years and the rocks in the East, towards Hartebeespoort, date to about 2.2 billion years. These rock strata were subsequently tilted up and the rocks in the West of the Cradle of Humankind, towards Krugersdorp were uplifted first, causing increased erosion and forming the rolling hills in this part of the Cradle of Humankind.
Let's Get Technical
If you want to get technical, and who doesn’t, the fossil-bearing deposits are found in the Chuniespoort Group, of the Malmani Sub-group, of the Transvaal Supergroup of rocks, and were formed about 2.5 billion years ago. The Malmani subgroup is also divided into 5 sub-units: the Oaktree, Monte Christo, Lyttleton, Eccles and Frisco Formations. The region also contains traces of lead and copper, which were mined by prehistoric tribes and early settlers in the area.Excavation and Dating Techniques

So, once an archaeologist or palaeontologist has identified the existence of fossil-bearing rock, how do they get the stuff out? Well, excavation is a delicate, time-consuming and painstaking process that requires years of training and endless patient. It is much too complex a discipline to explain in a few broad paragraphs.
So here goes… Perhaps the most important aspect of excavation is context, also called provenience. Basically, this means that you want to record as much as possible about the position in which the fossil was found: Where was it found? How was it lying? What was it lying next to? What was above it? What was below it? All of this information may give you additional information and clues about the fossil, its environment, its surroundings and even its lifestyle that would be impossible to determine if you just picked it up and put it in a box.
The thing is that excavation is essentially a destructive process and, once you have removed the breccia or the fossil, you cannot put Humpty together again. So, you should plan your dig carefully and record as much information as possible about the fossils provenience before you remove it and put it in a storeroom.
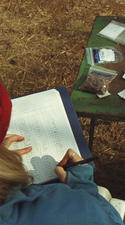
This includes taking pictures and keeping field notes, which is required by South African law. You should also never remove more material than you have to, and it is considered good practise to leave behind a ‘witness section’ so that subsequent investigators can continue the excavation in the future.
To Grid or Not

In the past, archaeologists used a grid system to determine a fossil’s provenience. This is a system whereby you stake out a series of strings or wires that criss-cross the site to form a regular grid of squares, called spits.
Archaeologists will then excavate each grid in sections of, say, 100 centimetres deep, sort through the material, take out the fossils and put them all into a bag that is marked with the grid and depth reference.
This was the system used at Sterkfontein for much of the last century, and the old wire grid is still suspended above the diggings.
The problem with this method is all the objects are lumped together and the individual provenience of each item is impossible to determine. With the new technology available to modern-day archaeologists, the grid-system is fast becoming obsolete.
Now, using a sophisticated piece of equipment called a Total Station (kinda like a combination theodolite and GPS) archaeologists are able to record the exact position and height of every object that they find.
This yields a 3D provenience which is be recorded on an ID tag and placed in a plastic bag along with the fossil.
The Aging Process

There are two main approaches to excavations: horizontal and vertical. As a very broad rule of thumb, things found within the same level are contemporaneous, while things found in the vertical plane indicate age (higher is younger, deeper is older).
So, the choice of whether you dig across or down largely depends on what you are trying to find out. If you want a broad picture of a specific moment in time you dig across; if you want to determine the historical sequence of a site, you dig down.
Of course, things are never that clear-cut and things can get topsy-turvy, especially in caves that keep collapsing and shifting. So an analysis of the specific stratigraphy of a site is usually required before you can determine the temporal relationship between objects.
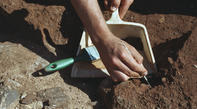
You also get two types of digging conditions: those that are in loose soil and those that are in hard, calcified deposits such as cave breccia. In loose soil, the most important tools are a builder’s trowel and a selection of brushes and dental picks – all very high-tech. The trowel is used to loosen and scrape away the soil.
The pick is used to delicately expose the fossil and the brush is used to brush away the fine sand.
For good measure, all the soil around the fossil is usually collected and sifted through a series of fine wire-mesh sieves to remove even the smallest bones and fossil fragments, which are bagged and tagged for later analysis in the lab.
Extraction
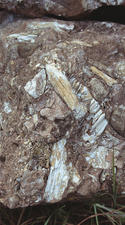
When you are working with hard breccia, however, you usually cannot remove the fossil from the rock while you are on-site. Instead, you need to cut out the block of fossil-bearing breccia and take it to a lab. To do this, you use a hand drill to make a number of holes around the block.
Then you insert two wedges into the hole and carefully drive a stake between them to split the rock cleanly away from the wall or floor. Reference points are then marked on the block so that co-ordinates can be plotted at a later stage. Once you are back in the Lab, you can slowly and delicately remove the fossil from the rock matrix, either by a fine drill (like an engraver’s tool) or through careful use of weak acid baths that will dissolve the breccia while keeping the fossil intact.
Both of these techniques require years of practice and even more patience. In terms of dating fossils, there are two kinds of general approaches: relative dating and absolute or chronometric dating. The first kind is where you try to work out if an object is older or younger than another object found at the same site, and this is usually done by working out the age of the soil deposit in which the fossil was found by analysing the other material (especially flora and fauna) found in the same layer and comparing it to other sites.
Before the 1960’s, most dating was done this way. Chronometric dating is concerned with finding out the age of a fossil in terms of ‘how many years before the present’. This is done through a number of fiendishly complicated techniques that usually involve calculating how much of a specific chemical (such as carbon) is present in the fossil, and then matching that to the known and constant rate of decay of that chemical.
These radiometric methods can measure for potassium-argon (K-Ar), carbon (only if the object is less than 50 000 years old), and other radioactive elements. There is also a method called Palaeo-magnetism that analysis the orientation of the particles inside the fossil to measure how many times the magnetic field of the Earth has shifted (something it does every few hundred-thousand years, apparently), but that’s just too mind-boggling for me to fully comprehend.
By David Fleminger