Preparing a Cow for Milking
Milk is produced and stored in the udder. It can only be removed from the udder with the cooperation of the cow. This depends on the way the cow is treated before milking.

Cows have to be stimulated to let milk down. The milk let-down process starts with cows being brought to the milking parlour with the general pre-milking sounds such as cans being moved around. This causes a nerve impulse in the brain to activate the pituitary gland to release the milk let-down hormone, oxytocin, into the blood.
Oxytocin is a hormone and a neurotransmitter that is involved in birth and breastfeeding. When oxytocin reaches the udder, it causes the epithelial cells surrounding the milk cells (alveoli) in the udder to contract, forcing milk out into the ducts. The milk ducts, udder and teat reservoirs then become filled with milk.
Milk let-down has occurred and the cow can now be milked. Milk let-down is disturbed when a cow is frightened, in pain or angry. This is caused by the release of the hormone adrenaline, this prevents the release of oxytocin.
Washing and Stimulating the Teats

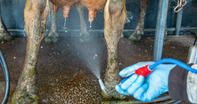
The udder and teats of cows have to be cleaned before milking to prevent contamination of the milk. This will reduce its keeping quality and can transfer pathogens (diseases) to humans. Hand stimulation of the udder consists of washing of the teats and udder for 30 to 40 seconds, this also works as a strong stimulation, resulting in high oxytocin levels in the blood.
Breeds differ in their response to udder stimulation. Holstein cows (or high producing cows) are easier to stimulate than other breeds (possibly because of higher pressure in the udder). Zebu type cows (such as Brahman, Afrikaner and Nguni) are not easily stimulated unless the calf suckles.
For optimal milk flow, milking should start within 40 to 60 seconds after stimulation. A delay between stimulation and the start of milking has several negative effects on the milk yield. As it can extend milking time, increase friction on teat-ends and may shorten the lactation period because of earlier drying off.
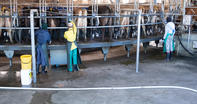
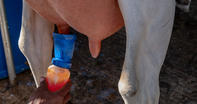
The pre-milking procedure is as follows: use running water to wash and clean the teats and the lower parts of the udder. Thereafter, dry teats using a disposable paper cloth, hand-milk each teat onto a black surface (mastitis cup) to check for clots and to remove bacteria in the milk duct. Clots in the milk is an indication of mastitis or udder infection. When no clots are observed, milking can start using either a hand-method or by attaching the milking machine cluster.
Hand Milking vs Machine Milking

Using the hand-milking method, milk is pressed out of the teats by a squeezing action of the fingers from the base of the teats. More commonly, a pulling action is used. Start at the base of the teat and pull down towards the teat-end. To reduce friction, lubricate teats using a milk salve or milking cream containing lanolin.
Machine-milking removes milk from the udder under a vacuum using a suction action. The pulsating action of the milking machine is a simulation of the way a calf is suckling, i.e. applying vacuum and then releasing to allow air pressure to recover. When the milk flow slows down during machine-milking, downward pressure on the cluster can be applied to remove the last milk in the udder. Milking is complete when the milk flow stops or when the udder feels soft and looks saggy. After milking, clean and protect the teat-ends by applying a post-milking disinfectant or teat dip.
Provide some feed to cows for them to remain standing as the teat-ends remain open for a while after milking. This should prevent infection-causing bacteria from entering the teat opening.